
Yesterday, I showed examples in my review (and giveaway!) of J. Herbin's Supple Sealing Wax. One of the examples was a spread I did in Journal52 journal. I didn't exactly plan it that way, but it ended up meeting the criteria for prompts 44-Skyline, 45-Thinking of You and 46-Napkins.
I usually share my process in creating these pages, so even though I've already shared the finished work in my review, I've posted my process for today.

1. I created wax embellishments by melting some copper colored sealing wax.


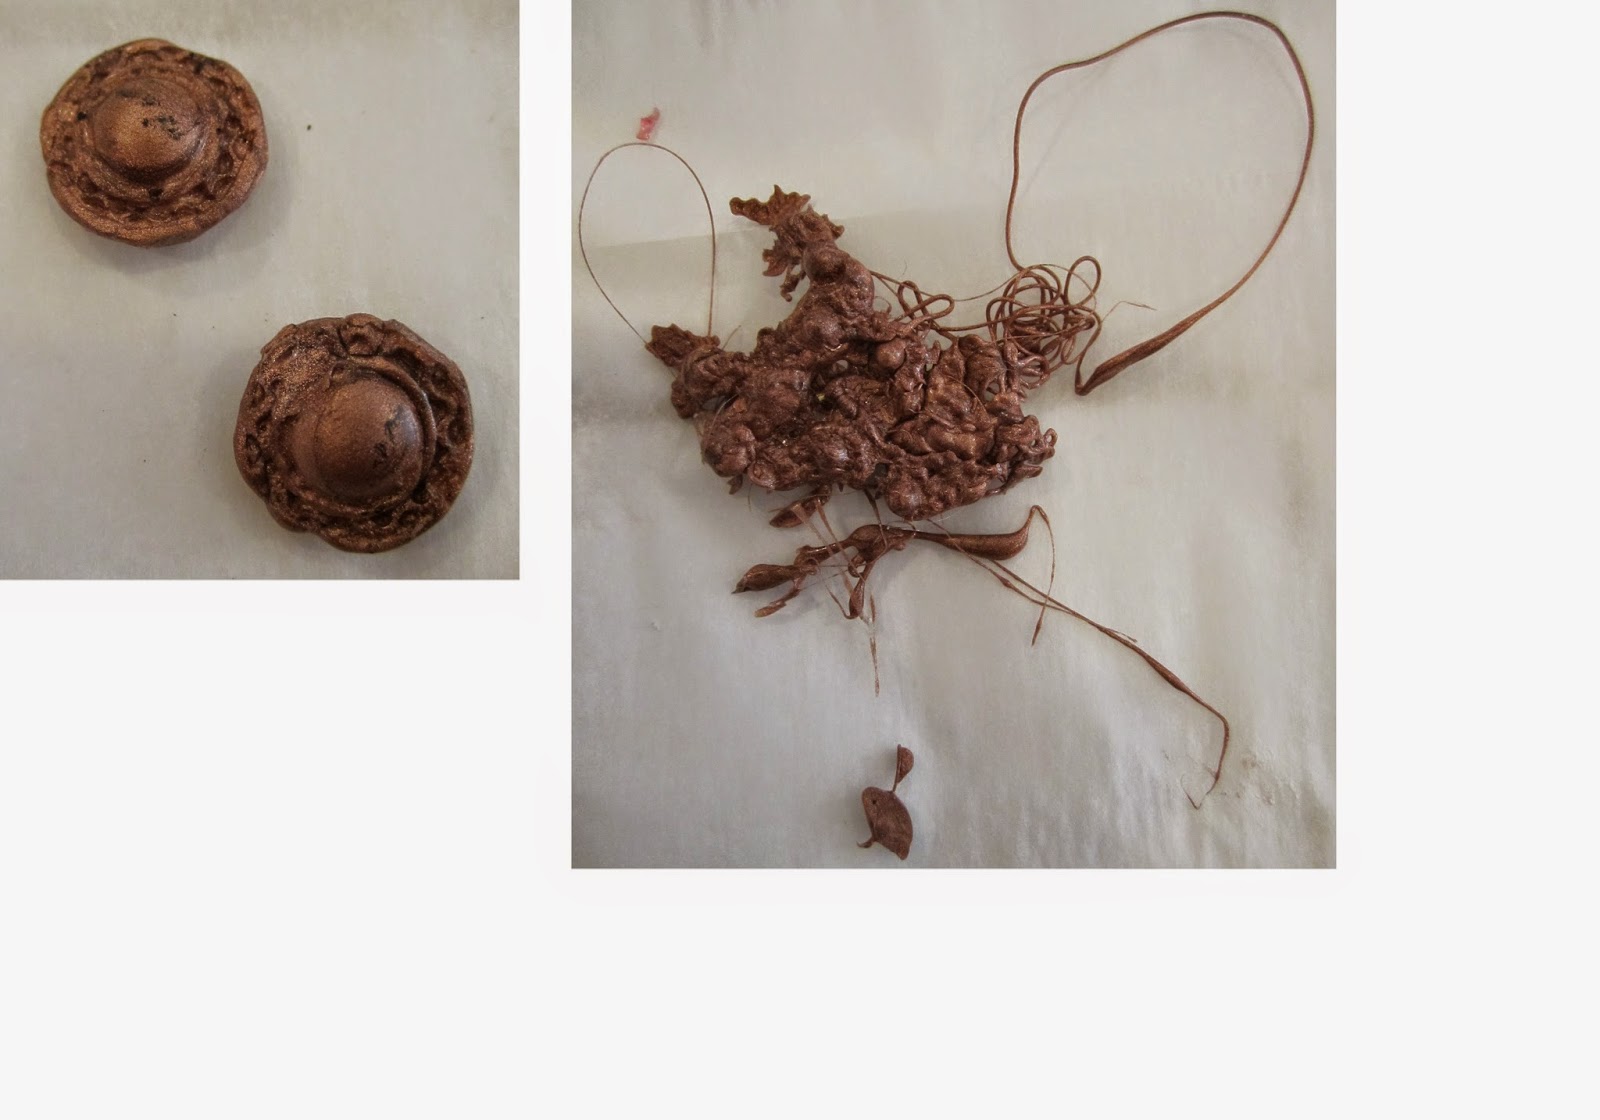


The wax sets almost immediately, and that was my biggest challenge--getting enough wax into the mold before it started to cure. I left the wax in the mold for a least 5 minutes, but I could have popped it out sooner.
I was very careful to clean out all the bits of wax, and wiped it down. The Amazing Remelt can be remelted and re-used, so I didn't want any wax left stuck in it.


I left the page overnight to be sure the decoupage glue was well and truly cured. An hour or so would have probably been sufficient, but napkins are not archival, so I wanted to be sure no moisture was trapped in with them.

Viva Decor has a product called Inka Gold, which is, in essence, a colored cold beeswax (as opposed to the hot melted wax, you traditionally use for encaustic.
It gives your work that melted encaustic work along with beautiful shimmery colors. It doesn't spread easily, so it can take a little while to cover a large area. Once spread on and dried (it dries almost immediately) it doesn't come off.
I worked the beeswax into the crevices and brought out as much of the texture as I could, while leaving the ridges the white of the napkin.

On one of the napkins, I drizzled some of the sealing wax into the words 'Thinking About You' (which should have been Thinking OF You--ah well). Then I tore off the piece of napkin with the words, and decoupaged it onto the page. I should have written out 'thinking' in three stages. I tried to write too many characters and the wax set too much, so the 'ing' isn't very good. It was my last napkin, though (we don't use napkins much around here, lol) so I used it.


I usually share my process in creating these pages, so even though I've already shared the finished work in my review, I've posted my process for today.
1. I created wax embellishments by melting some copper colored sealing wax.
I used buttons and pendents and a few other odds and ends to make the molds.
In one case, I didn't pour fast enough. The wax got really stringy and created a fantastic texture.
The Amazing Remelt comes in a tub looking like a block of jello. You cut it up and melt it in the microwave or craft oven, then pour it over the object you want to mold. After 10-15 minutes, you pull the object out and you have a mold.
I melted the sealing wax into a make-shift double boiler, by putting the stick into an old tin lid that I had, pouring boiling water into a mug, and then floating the tin in the boiling water. After a few minutes, I poured the wax that had melted into the remelt mold. (I had to pour out the water and add freshly boiling water 3 times before the entire stick was melted).
I was very careful to clean out all the bits of wax, and wiped it down. The Amazing Remelt can be remelted and re-used, so I didn't want any wax left stuck in it.
One of the Journal52 prompts was Napkins. All I had were white napkins, and I really didn't want to go out and buy printed ones just for this project. Instead, inspired by the idea of wax, I decided to go for a faux Encaustic look.
I tore up several napkins into strips, and decoupaged them onto the page, leaving lots of ridges and swirls as I went.
I left the page overnight to be sure the decoupage glue was well and truly cured. An hour or so would have probably been sufficient, but napkins are not archival, so I wanted to be sure no moisture was trapped in with them.
Viva Decor has a product called Inka Gold, which is, in essence, a colored cold beeswax (as opposed to the hot melted wax, you traditionally use for encaustic.
It gives your work that melted encaustic work along with beautiful shimmery colors. It doesn't spread easily, so it can take a little while to cover a large area. Once spread on and dried (it dries almost immediately) it doesn't come off.
I worked the beeswax into the crevices and brought out as much of the texture as I could, while leaving the ridges the white of the napkin.
On one of the napkins, I drizzled some of the sealing wax into the words 'Thinking About You' (which should have been Thinking OF You--ah well). Then I tore off the piece of napkin with the words, and decoupaged it onto the page. I should have written out 'thinking' in three stages. I tried to write too many characters and the wax set too much, so the 'ing' isn't very good. It was my last napkin, though (we don't use napkins much around here, lol) so I used it.
The Inka Gold beeswax works on different surfaces, including...wax! So I was able to change the color on my embellishments.
I used Kuretake Clean Color marker pens to draw the birds, and ran the black one over the green grass area to bring out more of the texture.
Then, I glued down the embellishments with E6000 glue.
Supplies
Viva Decor Inka Gold Beeswax-Jade, Steelblue, Rose Quartz
Watercolor Paper Journal Page
White dinner napkins
E6000 glues
Decou-Page gel medium
Kuretake Clean Color pens-black, green
It's beautiful Sandra! I love it!
ReplyDeleteThank you! Have you entered for a chance to win some sealing wax?
DeleteMaytag dryer troubleshooting
ReplyDelete